
In this series, Muzzle Blasts Field Agent Ethan cracks open a Traditions St. Louis Hawken Kit and builds it. These kits are a simple and affordable way to get started in muzzleloading, and kits are bigger than ever with COVID 19 keeping many at home.
Check out this list of kits to find the perfect one for you
NMLRA Members can order their Traditions kits from Flintlocks LLC and receive an exclusive discount!
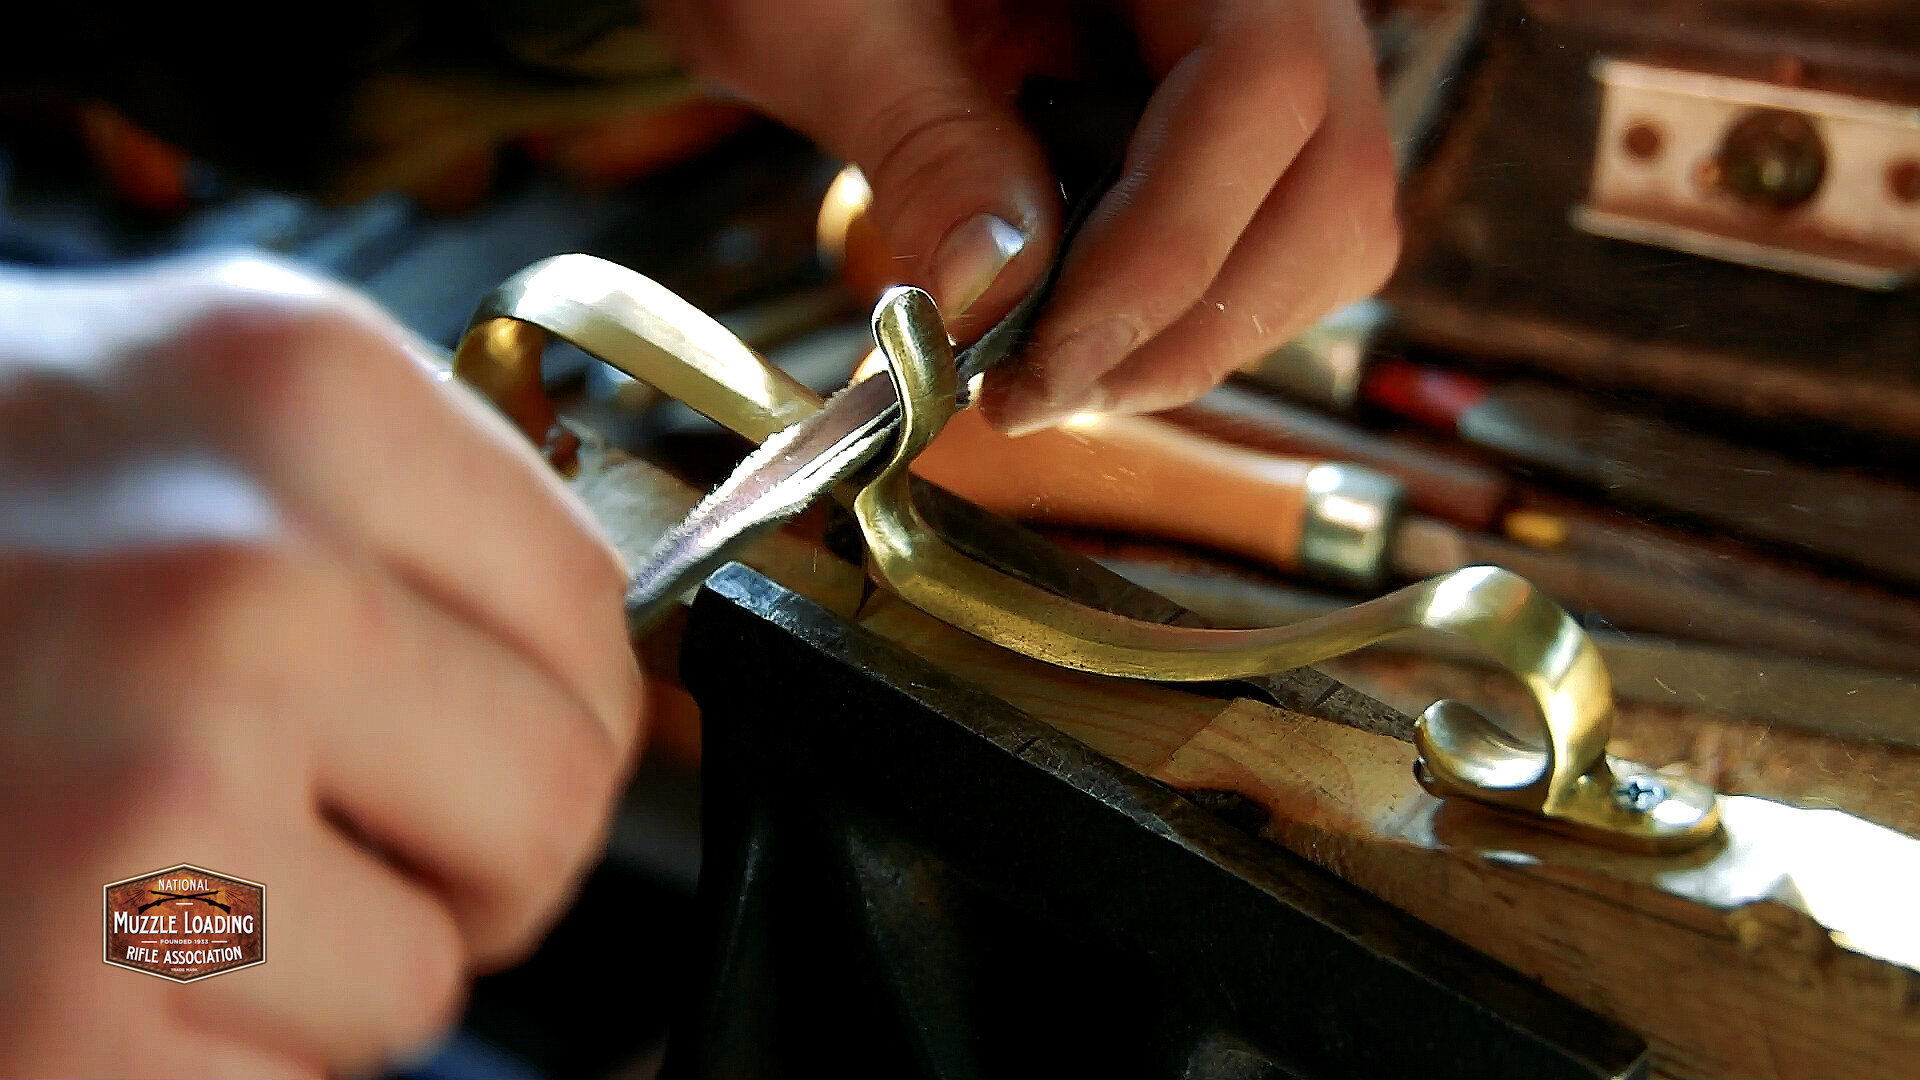
With our hardware finished, we’re ready to move onto finishing out stock. In the previous parts of this series, we’ve done a lot to this stock to make it fit and feel right, but the stain and oiling is going to be the most dramatic change, so buckle up and let’s get to it.

For the series, I’m going to try out 3 different wood stains,
Varathane Chestnut
Varathane Gunstock
Minwax Cherry No. 235
These stains are available at any hardware or home improvement store and will work fine for what we are doing. I’ve had them in the shop for a while for use on some home improvement projects, so if you are worried about buying a whole can for just this stock, remember you can always use the rest on something else!
If you are looking to build a very nice longrifle, or one a bit more historically accurate than this, consider checking out some of the longrifle specific stains available from Dixie Gun Works, Flintlocks LLC, Jim Chambers Flintlocks, Track of the Wolf, or any other muzzleloading supply shop. The colors and options they have are a higher quality and offer some nicer colors than we can get with these generic wood stains.
When selecting your stain, it helps to have some reference images of rifles you like, or an idea in a sketchbook or in your head about how you want the rifle to look. As I’ve said many times in this series, I’m looking to build an aged, used looking gun, so when it comes to stock color choice I’m wanting a warm brown color. If you are building a nice new Hawken you might try something like a warm maroon or red, or if you are wanting it to look even older, a deep brown.
Don’t trust the color of the stain as it’s represented on the can though, depending on the wood you are using and even the tree it was cut from the colors will look differently. Because of this, I’m trying out three stains and then I’ll choose the one I like the most. That way, I have a better idea of what the stock can and will look like when we are done.
Now onto the staining!
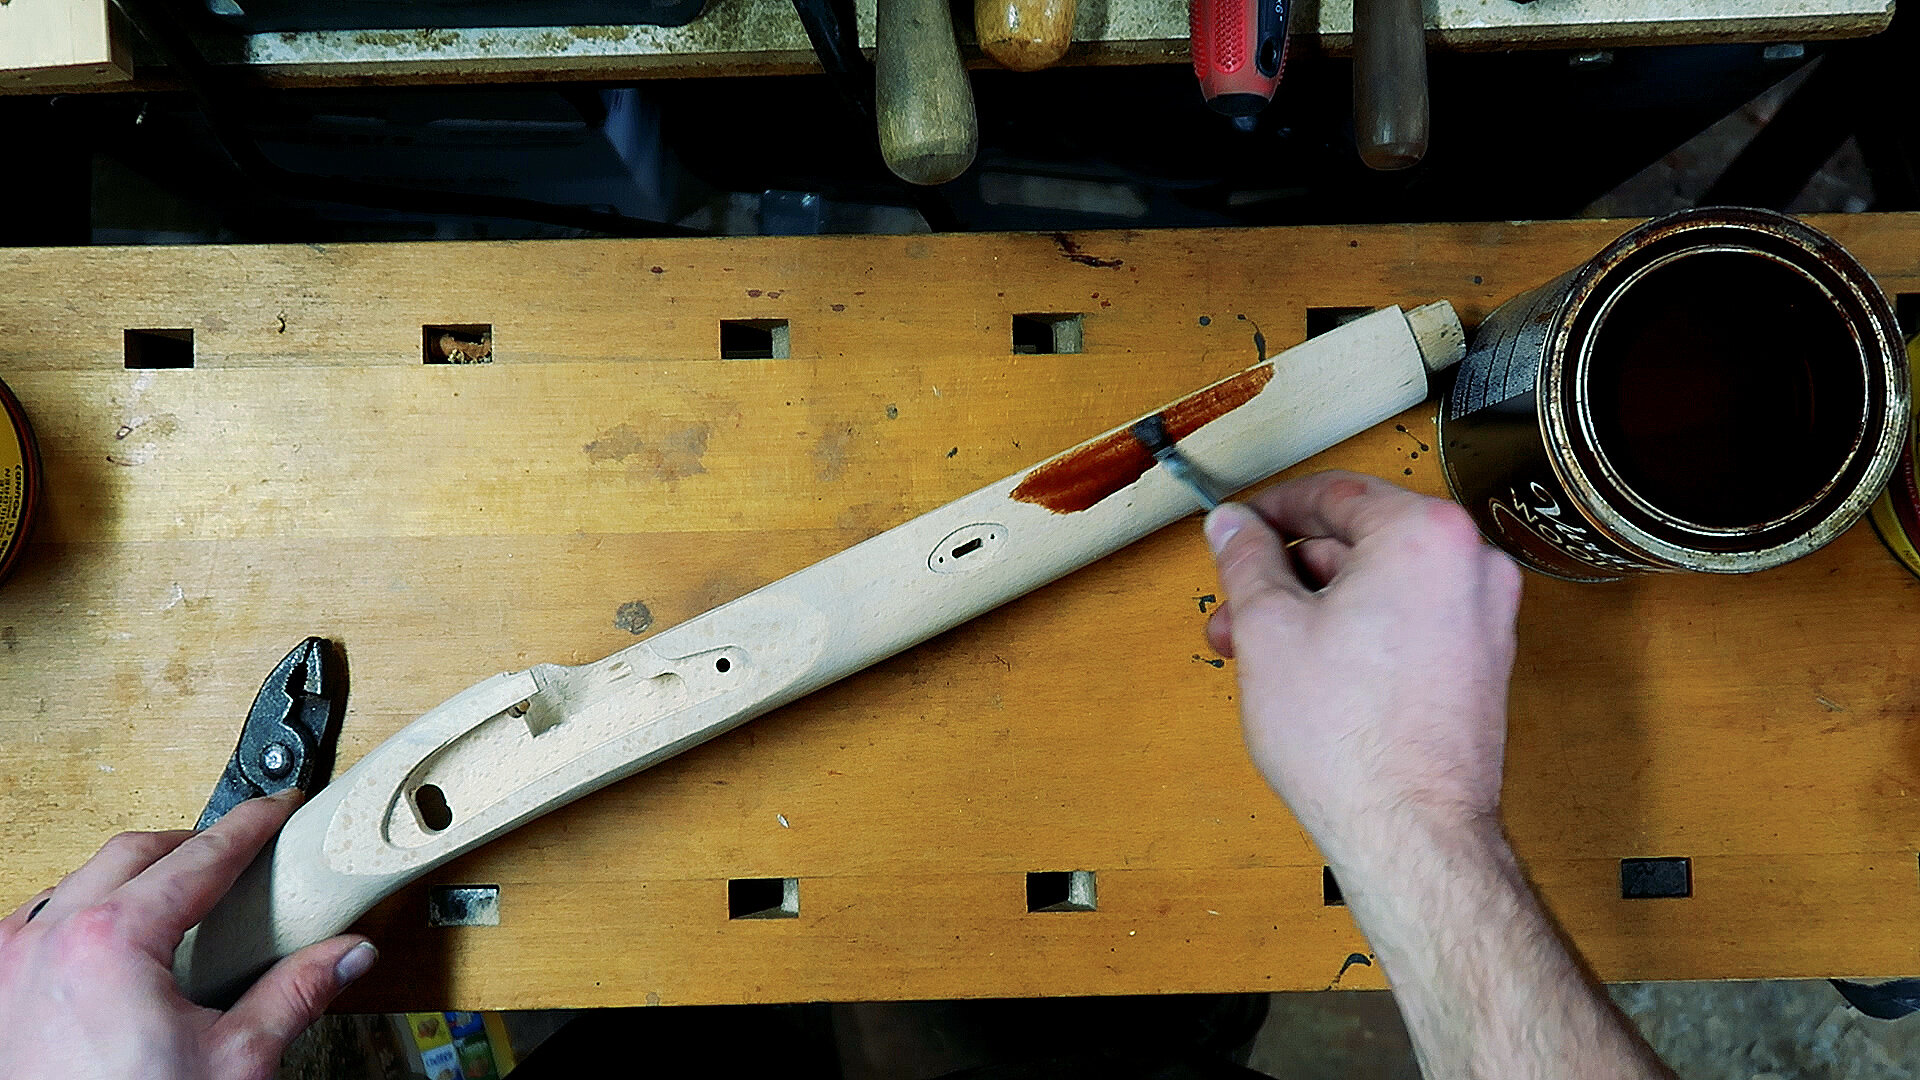
When staining your stock, especially for the first time it’s nice to have an extra piece of the stock wood to test your stains on. Because we don’t have any large cut offs of our stock, we’ll be testing the stock stain on the barrel channel. The barrel channel is not regularly seen and gives us a fine spot to test these stains. You can really use any large inlet on the stock, the barrel channel is just the easiest place that we found to test.
Before applying stain, make sure you’ve given each a good long stir. Not mixing the stain before application can give you a false color, and we don’t want that.

For each stain, use a fresh cotton swab to apply a dab of the stain to your barrel channel. It helps to leave some space between each spot of stain to allot for any runoff. After applying samples of your stain, let them dry for 10-15 minutes and apply another coat. I repeated this process 4 times to get what I felt was an accurate color for my stock.
It might help you select a final stain if you set some of your finished brass and iron parts in the same space as the stock to get an idea of how they might look together.
Of the three stains I tried, the Varathane colors were my favorites. I’m not sure if the Minwax cherry was older, but it never became the strong cherry color I was looking for. In the end I liked the Verathane Gunstock Stain the best. It was a nice warm color, but wasn’t too saturated and bright. I feel like it can blend in enough in the woods and still look good at the range. Go ahead and put the lid on the stains you aren’t going to be using and put them back on the shelf. Grab a cheap brush and lets start staining the stock.

Using a brush, begin applying the stain to the stock in a light, even coat. If you start noticing the stain running across the surface of the stock, you are applying too much. Just keep pushing your brush through those stain runs until they are soaked into the wood and pick up less stain with your next brushfull. We don’t want those stain runs to dry and leave an ugly finish, so keep an eye out for them as you work.

While brushing your stain on, I found it useful to cover the edges of the various inlets on the stocks, but you don’t need to fill all of each inlet with stain. A place of note that you’ll want to add some extra stain are the walls of the trigger inlet. If you’re kit is like mine, your trigger will be set fairly deep into the stock, leaving some wood to be seen.

I started staining on the muzzle end and worked my way back to the lock, using the wrist and buttstock as a handle. As I kept working back, the fore-end began to dry and became my handle to use as I completed the staining on the buttstock.
As you prepare for your second coat, be sure to check the directions on your specific stain. The one I’m using says to wait 2 hours before applying a second coat.
Using multiple coats helps us with a couple things.
We get a richer, deeper color with each coat
We have a chance to hide any missed spots from the first coat. We don’t want any bright white wood sticking out like a sore thumb.
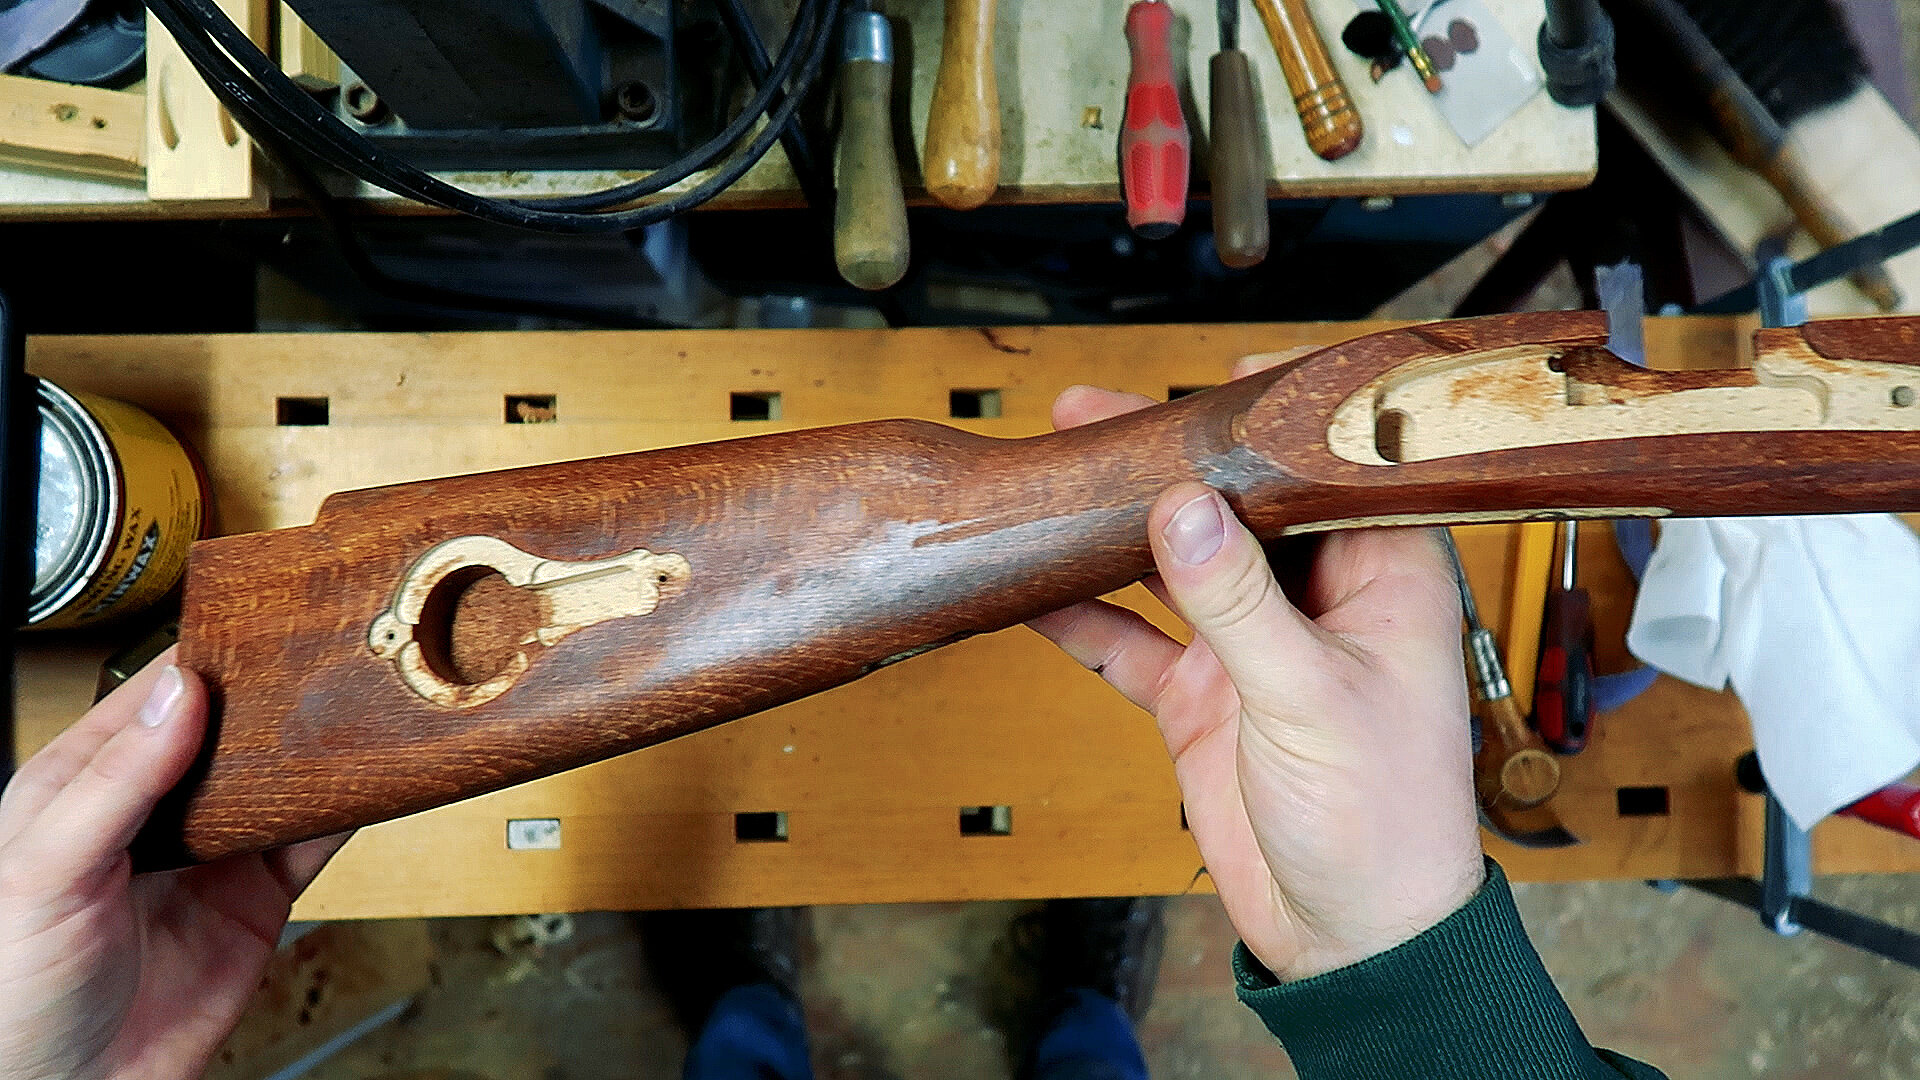
In the end, I used 3 coats of stain to get the color I wanted on my stock. You can go father if you want, but my third coat was much slower to dry and be soaked in so I thought the wood had had enough. After applying the last coat of stain, I let the stock sit overnight and into the next day. If you’ve used too much stain you’ll notice your stock is sticky. Use your scotch brite pad or a shop rag to remove any extra oil and let it sit to dry out some more. The scotch brite will also take away some of the shine left on the stock from your stock, leaving you with a matte finish. Seeing these results, I got curious and wanted to try burnishing my stock.

Burnishing is an old technique used on many longrifles over time. Traditionally this is done by using a piece of bone or antler to rub the entire stock, compressing the food fibers and leaving you with a solid matte finish.


With the stock where we like it from the stain and burnishing, it’s time to add some oil. Just about everyone has their favorite oiling process, and just about all of them work well for what we are doing. I’m going to be using some danish oil, it’s a simple colorless oil that penetrates well and doesn’t leave a polyurethane like finish on the stock. A favorite among gun builders is going to be “Tru Oil” from Formby’s. If you can’t find Formby’s, Birchwood Casey sells some as well.
With your selected Oil ready, begin applying a nice light coat to the stock. I recommend sitting with the stock and applying an even coat all over the stock continuously for about an hour. This first coat is going to be soaked up fast, and as long as you keep applying oil the wood is going to drink it up. This is going to give you a good base to start from. With your first main coat applied, let it sit and dry for an hour and then wipe down any excess oil with a shop rag. This will keep your stock from getting sticky and make applying future coats easier. Allow your stock to dry overnight before applying subsequent coats.

The old saying on applying oil is, “A coat an hour for a day, a coat a day for a week, a coat a week for a month, and a coat a month for a year. “
In total I put down 3 coats as I finished up the kit and have added a couple more since to keep building up the kind of finish I want. If your oil is leaving a glossy surface, gently take your scotch brite to it and it will cut that gloss back nicely.
In next week’s installment of this series, we’ll be heading into final assembly!
There are a million ways to assemble a muzzleloader, and a million of them are right. This is by no means meant to be the ONLY way to build one of these kits, just one way.
Have a suggestion? Email us at media@nmlra.org and we’ll take your comments into account as we continue the series.