


Welcome back to Craftsman his corner. This week we're going to be making this leather cow's knee or lock cover to keep our flintlock dry while we're out in the woods. This is a relatively simple project that took me just over an hour to put together from start to finish. To get started, we've got our written article here. We've also got our ruler, sharp knife to cut the leather, some thread leather dye, and all in our stitching chisel. The pattern in the original article didn't really suit my personal tastes. So I'm going to be using this rifle men's lock cover pattern, we'll have links to both patterns in the blog here.
Now traditionally, these would have been made out of an actual cow's knee, but I don't have one of those handy here. So I'm just going to be using some thick, about one eighth inch leather. This has already been treated with some oil so it's going to be nice and stiff for us and already a little bit water resistant to protect our lock. You want to make sure that when you're doing your layout process, you're putting all of your marks on what will be the inside of your cow's knee. Sometimes depending on the marking tool that you're using. The marks will prevent the leather dye from soaking in and kind of make some weird nasty little marks all over everything.


This is a simple cow's knee lock cover, there are a lot more complex ones out there that I've seen, some will do a lot to make the stitching and the pattern follow the shape or the profile of their flintlock as this one ages though the thickness of the leather and the oil already in it, it's going to lend itself to shaping over time to the rifle that it's attached to. As we finish up here and I add some of the measurements here you're gonna see that this isn't very large. We don't want this to be a big bulky piece of leather attached to the flintlock. We want it to be a nice simple cover that protects the priming pan so we can take that shot at that deer or turkey here you can see the measurements laid out it's not very big. Now I'm using this Derwent pastel Chinese white pencil. This is something that has worked really well with this oil leather, I highly recommend it.

I'm going to be using this Mora laminated blade to cut To leather using this metal ruler as a straight edge with these angled cuts like this using scissors just is going to be a pain in the butt. So using this knife allows me to get some nice crisp straight cuts. As I work my way around this piece setting those aside I'm just going to start working my way around the edges to remove it from the large leather piece that is now folded off of the table and down onto the floor of the shop. As I tried to work this out, it's always good to cut a little bit past your stopping point just so you don't have those little caught corners giving you frayed edges.


We're going to Get out our Fiebings leather dye This is mixed 5050 with some alcohol to get some better economy out of it. Be sure to put gloves on both hands though, I thought I could get away with one and just got Messier and Messier.
I'm just going to take a nice kind of dry brush approach to this next round and going perpendicular to the strokes I made last time I'm going to apply a thin second coat.
Once we're finished with that second coat, we're going to go ahead and put our leather dye away just so we don't spill it anymore. And we're going to let this sit for 15-20 minutes, maybe even half an hour if it's a real humid day just to make sure we don't get too dirty.


Next up, we're going to work on making the welds to strengthen our stitching. This is going to be a really high wire item being out in the elements all the time. So adding this weld in here just like a knife sheath is really going to make this a nice strong piece. Overall, I think my thickness was probably about a quarter of an inch, maybe just a little bit over for each of these welds and I'm just kind of eyeballing the link. To match up with the stitch areas on the cow's knee, we're going to soak these in our same dye mixture as we use for the rest of the piece just to make sure everything matches up. To save time you could cut these out and dye them with your main piece at the same time.
.We're going to be using some tite bond three to glue the welts to the main piece here the tight bond dries at about half an hour and I find it to be a little bit more penetrative than superglue would be super glue dries a lot faster. But this tight bond I think gives a tougher hold on these leather projects, especially when I'm folding things over like this.


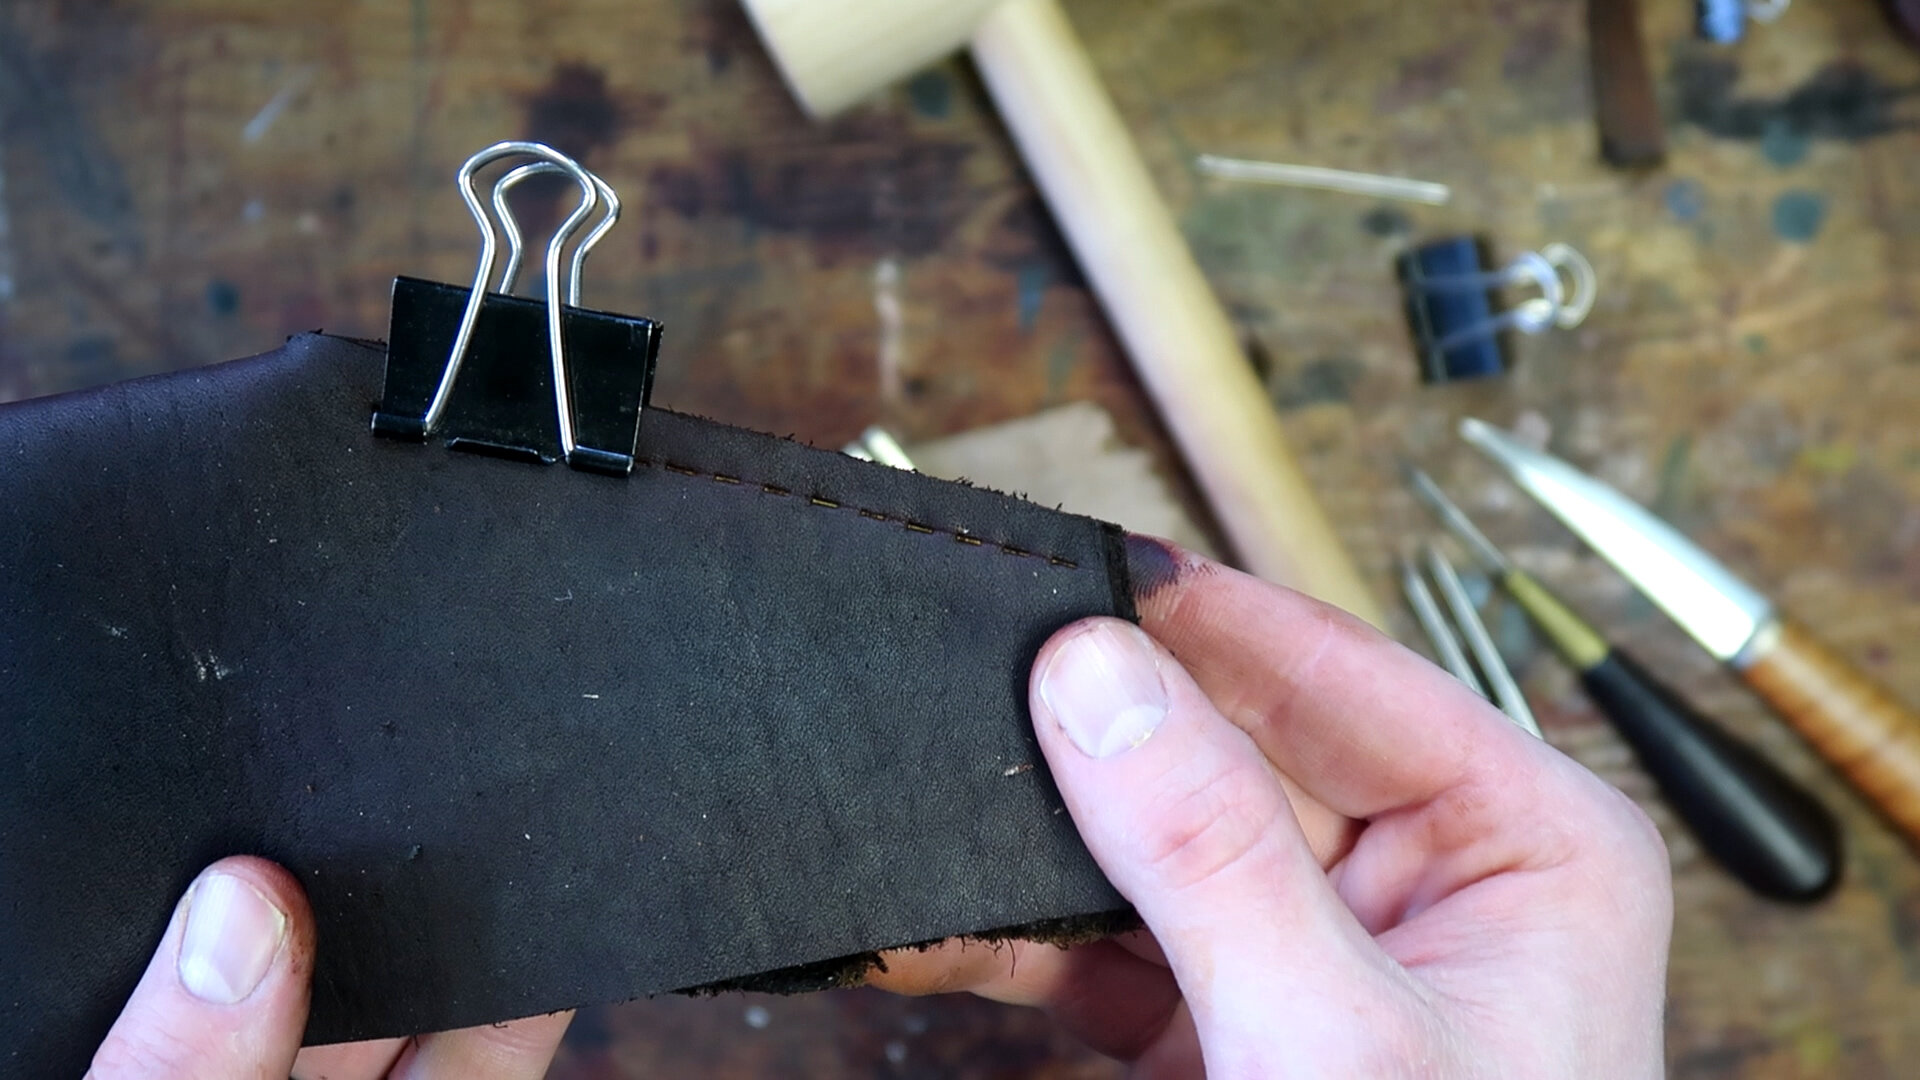
After applying glue to both sides of the welts, we're going to fold over the cow's knee and kind of pin it in place with our little binder clips. If you don't have any binder clips and you're doing a lot of leather work, I highly recommend investing in some binder clips. They're great little portable vise and I think Real necessary for projects like this, I'm making sure to line everything up. While we can take this down to the bell grinder and even things up, I don't want to do that if I don't have to. We're going to let this sit under pressure for about half an hour to make sure that glue gets a nice bond to the leather coming back to it.

Now we're going to use a pair of dividers to help lay out our stitching. I'm going to tweak the dividers. So there they run just about halfway down the well that way our stitch lines are going to be evenly distributed inside that well we don't have a risk of running out following our outside edge as the guide we're just going to firmly press our dividers into the leather to make this stitch guideline. After I've got that guideline on there. I'm going to attach the binder clip back on there just so I don't have anything separate.


To keep our stitching holes even I'm going to be using this stitching chisel it's number 80 46. If you're looking to pick one up. Keeping in about a quarter to an eighth of an inch from the outside edge. I'm going to start by marking these initial lines with a small wooden mallet. These initial Taps are kind of light just to get a good idea, and then I'm going to go through and finish getting the holes all the way through the leather so I can get my needles in there.

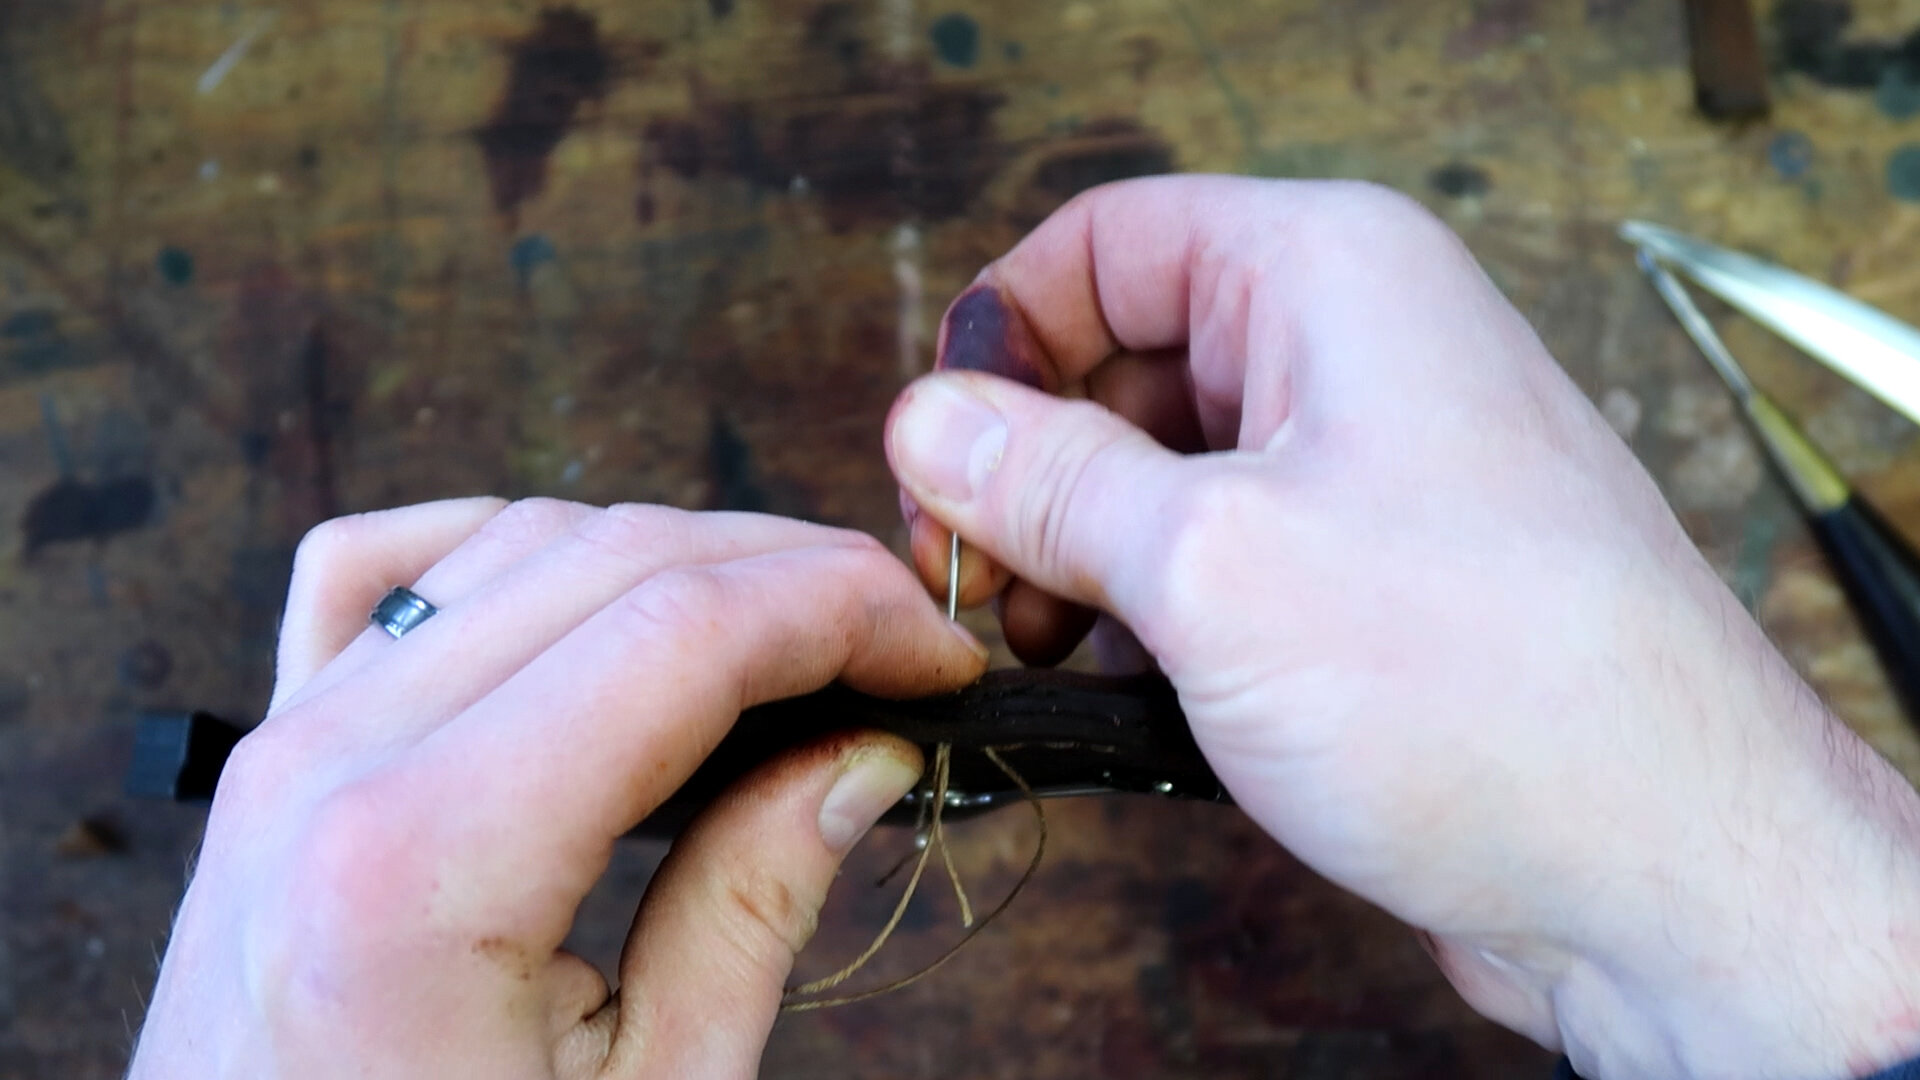
As we move on to stitching, it's important to remember to try to cut four to five times your, the length of the area you're stitching in thread, just to make sure that you have enough and you don't have to go through the painful process of splicing thread back in on a nice long run of stitching. Thankfully, these runs are pretty short, and I don't need to have too much extra with everything stitched up.
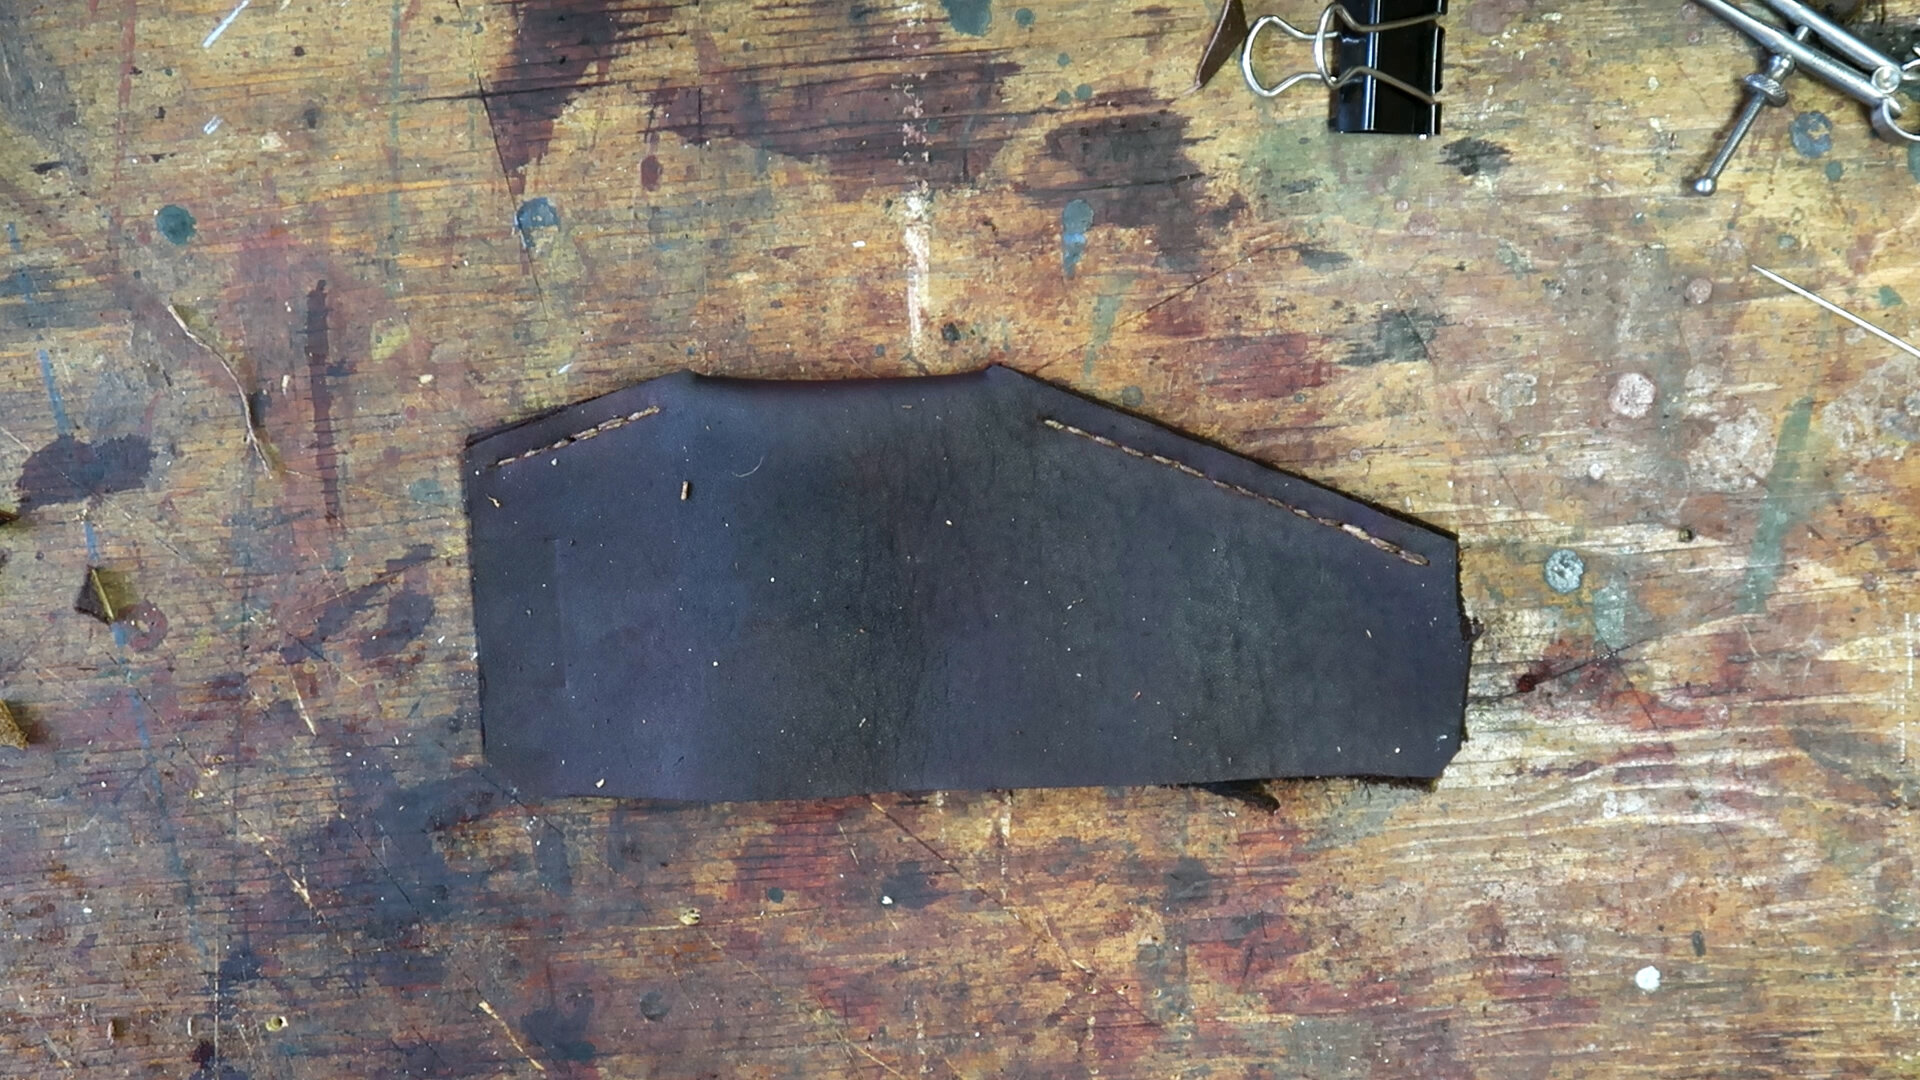

Now it's time to cut the holes for our ties that go on the bottom of the cows need to wrap it around the flintlock. So I'm going to mark here again about a quarter of an inch in on both sides. I'm going to mark a little x. I'm going to be doing this just with my sharp knife. I think the x kind of gives a little homespun look similar to what we did with the Flint wallet video. You can use a circular punch to do the same thing. You just want to make sure that it's large. enough that your leather strap that we're going to be cutting can fit through but not too large that it's going to pull through as you try to tighten everything.

As we move forward, we're going to start cutting our leather straps. Again, I'm keeping with that theme of about a quarter-inch wide and these are just under a foot long, I think probably about 1111 and a half inches and that seems to be enough from the one that I've made on the end that's going to be exposed to the outside, I'm cutting it a little bit of an angle so it feels a little bit more natural. And then we've got to apply the dye to these as well again to save time, you probably could have done all the cutting of the leather pieces at the beginning and died everything at the same time. As I was going through that process, I didn't really think about the time that I was spending on this. Following advice from Jeff Luke, I'm going to go ahead and put some dye on the front thread that I'm using just to kind of mute it and get it closer to the same color as the leather so it's not quite as bright. And I'm going along here touching up those cuts and the edges just to keep everything nice and even. And I'm going to clean up the bench here a little bit as we're waiting for these straps to dry. They're small, they don't take nearly as long, probably about five or 10 minutes and they're safe to hold with your bare hands. And when I say safe, I guess I just mean safe from getting yourself dirtier and dirtier

And then all we have left to do is attach our straps. Now I'm just putting the back end of the strap through each of the holes and tying it off in a small square knot. It's a nice simple little knot. I'll admit I haven't field tested this to see how much that knot is going to hold up. But for right now, I think it's doing just fine. Alternatively, as I was thinking about this project, you could probably cut to a really long strap one for each set of holes and run it all the way through and then you can just kind of stick your flintlock between the straps and the cows nice so that it can't fall off of your flintlock and you can just kind of loosen it up, dump it off the side and take your shot. That's the nice thing about all of this. This wasn't a difficult project to make. And once you get the basics down, you can really work at customizing it for yourself. So give this project a try. If nothing else, it's something to do to keep you a little busy and add a nice piece of gear to your to your kit.


Find out more about the National Muzzle Loading Rifle Association at our website - NMLRA.org


