
The Facebook Page - Getting Started
The first thing I’m going to recommend is start a facebook business page, this is a simple step, but in 2020, this is an important step. Facebook is where everyone hangs out and has become a great resource for vendors and craftspeople in the living history/muzzle loading community.
A facebook business page, or “Page” as facebook calls it, is separate from your personal facebook page, but is controlled by you when you log into your personal page. The business page is used as a digital table at a year round event everyone visits in their PJs from home.
People can visit your page, see what you are up to and follow you if they want to see updates. This is a PUBLIC facing page for your business, strangers, shoppers, and event visitors can follow your page but they won’t be your “Facebook friends”, allowing you to keep your personal friends a little separate from your business.
You can use your personal page as a business page, but it’s not as easy to find a person on facebook as it is a business. To interact with your personal page, visitors will have to be your facebook friend, but your facebook page is always open to visitors.
Part 1 - Building your page
To make a facebook business page, you must have a personal facebook account. This is easy to set up with an email address or a phone number. For your personal Facebook page, it is important to use your real first and last name, this will help the folks you see at events find you and know it’s the real you.
When making your facebook business page, use your business, vendor, studio, or sutler name just as you would on an event or show application. This will make it easier for event goers to find you and know you are so and so from the such and such show they’ve been attending for years.
Remember, making a business page for your shop or studio isn’t meant as a way to replace the in-person event, but to keep your customers in contact with you year round, from anywhere.
So you’ve got your page, what’s next?
First, lets make sure you have a username so you and your fans can easily reference your page from all over facebook. A username makes it simple for people to mention your business to their friends and makes it easier for people to find you.
Side note: Part of what we’re doing here is putting the name of you and your business online as often as possible. This is Search Engine Optimization, or SEO, at a base level. Putting your name out there and marking the things off this short list moves you up in the list when people search for you or what you do.
With these initial steps completed, you are just about there! Here’s a checklist of items to fill out.
General
Make sure your “page visibility” is set to “page published”
The rest of the settings under general are really up to you, the page owner. My recommendations are to make everything as public as you are comfortable with. Remember, this is all about getting in front of people, keeping your page a secret doesn’t help your business.
Page info
Description, Categories, website, email, price range, and products
Page info is the real meat and potatoes of your page. This information will be used to help people find your page, be sure to fill these out thoroughly.
Call to action Button
This button is featured on your page at the top, near your cover photo. Facebook directs people to this button by keeping it large and blue no matter what. What this button does is up to you. If you want people to visit your online store, add a link to your online store. Don’t have an online store? No problem, you can set this button to encourage private messages wherein people can ask you about your merchandise and arrange an order just like you would over the phone or mail.
This information is what we call “Meta Data”. Meta Data is data associated with your page that search engines use to find you on the web. Think of meta data as a sign along the highway. The more information you add, the more signs you are putting on the road. The more signs, the more exposure. More exposure can lead to more sales.
Part 2 - A fresh coat of paint
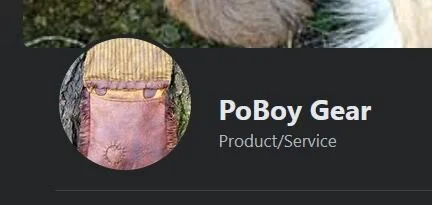
Next up we want to add a couple photos to make our page look nice. Facebook Pages have two main photos, the first being your profile picture. Much like your personal facebook profile picture, this is the most commonly seen photo. This will be next to your posts, comments, and messages all over facebook.
When picking a profile picture, you want to be sure it is recognizable. Use a photo of your in person sign, a unique item that only you make/sell, or a photo of your business logo. Personally, I like using a digital version of a logo, this ensures a clean, professional look across facebook. See these examples and more at NMLRA.org, link in the description


We’ll be making a video on photography practices soon, be sure to check that out for some tips on taking better photographs of your items to present them online in the best way possible.
The second photo to add to your page is your “cover photo”. Your cover photo is a large image displayed at the top of your page. This is only seen when people visit your page, or hover over your name on facebook with their mouse. For your cover photo, it is best to use a high quality image of some of your best known products.
Note: This image is short and wide, it may be hard to feature an entire item, in this case use a close up photo that shows the detail of your item.
If you are an artisan, include a photo of an item that is uniquely your style, detail shots of bags, horns, rifles, knives, etc make nice display pieces. If you make clothing, try photographing a selection of your items stacked up to show the variety of patterns and fabrics you offer.
When in doubt, it never hurts to get some reference. Check out your friends pages, or the pages of any business you know and like on facebook and see how they are doing things. You might get some ideas on how to make your page uniquely yours.


I like to change my cover photos every couple of months or seasonally to keep things fresh. With spring on the way, I might feature an image encouraging customers to purchase some goods and get outside. Around autumn or winter, Christmas especially, I’ll add a photo that feels more like Christmas. Remember, your facebook page is like a digital storefront, decorate and change it just as you would a real life store, tent, or table to attract customers and make them feel welcome.
Part 3 - Open for Business
With your photos sorted and your information entered, you are ready to rock and roll. Now you can close facebook and never open it again, right? Not quite.
With your page up and running it’s now up to you to maintain it, answer comments, and post regularly to keep your business in front of your customers.
Ideally our business should “post” on social media 3-4 times a day, but you’ll find that is a lot of work and takes time away from running your business. I know we all can’t afford to develop posts all day everyday, so it’s important to find a structure that works for you and your business. Posting to facebook shouldn’t be seen as an extra chore, but as a way for you to put in some time to advertise your business. At the NMLRA, we are reaching 100k people each month on social media, we couldn’t afford to ever reach that number of people on the radio, tv, or magazine advertising. Think of social media as another tool for you to reach customers.
To start out, try posting 3 times a week. Writing some text is nice, but photos are best. We are visual creatures. Think of your in person event set up, do you keep your tent closed with all of your items hidden away in boxes? No, you work year round on optimizing your display and changing things to attract customers. Your posts function the same way.
But Ethan, what do I post? All I do is sew, stitch, forge, trim, carve, or scrimshaw all day
Boom, right there you’ve answered your own question!
Events encourage craftspeople/vendors to demonstrate as much as possible. Why? Because people LOVE to see how things are made. Your business is no different, even online.
Posting online may feel like a chore, but the best way to get started is to take some photos while you are working.
You can
Snap some progress shots as you make something.
Taking a photo of each step tells your customers the story of how that item is made.
Show your raw materials next to a finished product
Think of the questions you are asked at events and try to answer them with photos accompanied by text as a post.
Share the development of a new product
Share sketches, drawings, or research associated with your process
If you are worried about someone taking your idea, don’t post the photos until you’ve brought the product to market, and use the photos to help promote your sweet new product!
Give a behind the scenes peak to your fans.
Your fans might only see you in period dress at an event, giving them a little insight into your workspace, shop or studio lets them feel connected to the products you sell.
It might seem silly to share some of this commonly “hidden” information, but it presents your customers with a feeling of authenticity, all the while you are subtly advertising your wares to them.
Okay, I’ve got some photos, now what?
If you’ve taken photos on your camera, be sure to transfer those to your computer, tablet, or phone to share. Depending on what tools you have at your disposal, you can share the photos as posts via facebook.com on your computer, or the facebook app on your mobile device.
Side Note: Facebook has a dedicated app for anyone running a facebook page. We will be going over this in a more advanced facebook video.
Facebook has some parameters they use to determine the quality of a post. Right now, they are as follows.
Posts with detailed, engaging text and high quality photos or videos with the subject in focus. Now, this isn’t official Facebook policity, but this information comes from folks who study facebook like we do muzzle loaders and living history, so I trust em. I can personally attest that this has worked for the NMLRA as well.
So what’s engaging Text?
Engaging text is hard to define, and varies from person to person. What I recommend is studying some of the posts you see your peers making, focusing on the ones with many comments and likes. These posts are being seen by more people and are “engaging” the audience, as seen by the likes and comments.
Here are some examples of posts lacking engagement and how I’d improve them. Note, these are all made up examples, I’m not targeting anyone with these “bad posts”
Example 1: “Making some breeches”
What I’d write : “Today I’m spending some time in the studio sewing up some mens late 18th century breeches. I’m using traditional linen fabric and pewter buttons. This is an age old pattern based on some found at Colonial Williamsburg.”
Example 2: “S Hooks”
What I’d write: “Forged some S hooks in the shop today, everyone always needs a few of these right? I know I’ve made hundreds now!
These are headed to the NMLRA Spring Nationals. You can find me on Commercial Row, I’ll be right across from the club house. If you can’t make it, send me a private message or check out the link to my online store in the comments”
It’s good to break up larger bodies of text into small paragraphs. People will skip over large bodies of text.
Example 3: “18th century bonnets back in stock”
What I’d write: “Today we received our order of 18th century bonnets from the lovely seamstresses at HistoricSewing Inc! These bonnets go great with all of our other ladies’ garments. If you are portraying a middle to lower class 18th century woman, you need one of these!
We’re excited to have these for next weekend’s event at the fort, but if you can’t make it, private message us and we’ll mail your order!”
This post promotes yourself, but also your business partner. Don’t be afraid of losing sales by doing this. Even if your customers buy from your partner, you are helping your partner by publicly showing gratitude as well as value.
This wraps up our first Video this multi part series. Up next we’ll be bringing you a similar look at Instagram, and how you can use it for your business.
Find out more about the National Muzzle Loading Rifle Association at our website - NMLRA.org